How To Remove Music From iPhone or iCloud
![]() If you like to use your iPhone for listening music as much as we do, you definitely know the problem with the storage space. The more music you load on your iPhone, the less space you have for apps, photos and other things. The Apple service iTunes Match offers one solution to the problem, because it loads your music to the iCloud. So you actually stream your music on your iPhones and iPads. This saves storage space, but strains the mobile data volume! If you want to do it without iTunes Match, because of that or because you do not want to spend $25 every year, you can take a different path and remove music from your iPhone now and then.
If you like to use your iPhone for listening music as much as we do, you definitely know the problem with the storage space. The more music you load on your iPhone, the less space you have for apps, photos and other things. The Apple service iTunes Match offers one solution to the problem, because it loads your music to the iCloud. So you actually stream your music on your iPhones and iPads. This saves storage space, but strains the mobile data volume! If you want to do it without iTunes Match, because of that or because you do not want to spend $25 every year, you can take a different path and remove music from your iPhone now and then.
Remove songs from the Music app
To remove certain songs from your Music app, you have to open the app first and then search the song that you want to delete. Choose the song in the list, so that you can see the currently playing song at the bottom. Tap this field, so that you get to the details view of the currently playing song. There you click the icon with the three dots in the bottom right corner and it will open a pop-up menu with different option. One is “Remove”, which you have to tap.
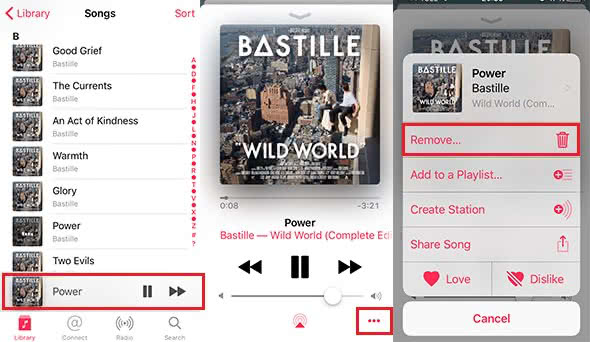
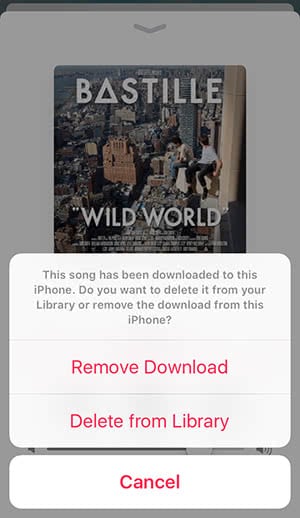
Now you have the option to remove the song from your iCloud library or to delete the download of the song from your iPhone.
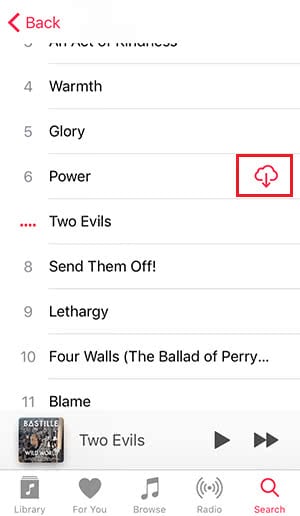
If you have saved the song locally on your iPhone and also in the iCloud (Apple Music or iTunes Match) you can always download it again by clicking the cloud icon.
Hide iCloud songs in Music app
1. iTunes Match
If you are using iTunes Match, the Music app shows all songs by default. So it will display the songs that you have saved locally on your iPhone and the songs from the iCloud. But you can also hide the iCloud songs, that you get a better overview of your music.
Settings → Music → Show All MusicTo hide the iCloud songs in the Music app, you have to go to the Settings of your iPhone. Then choose the menu item Music and then Show All Music. Activate the feature by tapping the button, so that it turns green or blue.
If you are opening the Music app now, you will only see the locally saved songs.
2. Apple Music
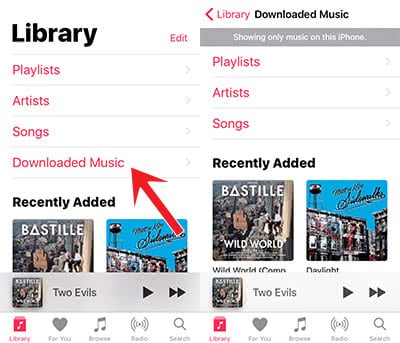
App → Library → Downloaded MusicAs a subscriber of Apple’s Music Streaming Service you also have the option to only display the downloaded music and to hide the iCloud songs. Open the app for that and go to the section Library in the bottom menu bar. Then choose Downloaded Music and it will display the songs that you have saved on your iPhone.
If you want to know another trick to save storage space on your iPhone, you can read our article about setting up a storage limit for music downloads.