How To Make “Portrait” Photos With Earlier iPhone Models
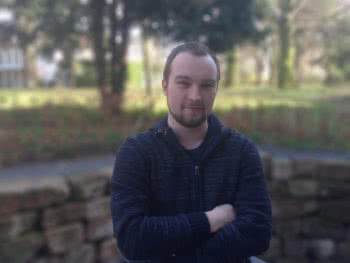
![]() Tadaa enables you to make perfect portraits with Bokeh effect on your iPhone, even though you don’t have an iPhone 7 Plus. You can edit photos easily with this app by putting a mask over the person on the photo. It will make the background blurry, but the person stays sharp. This results in a great depth effect like the Portrait Mode of the iPhone 7 Plus and the person is set in a focus of the photo.
Tadaa enables you to make perfect portraits with Bokeh effect on your iPhone, even though you don’t have an iPhone 7 Plus. You can edit photos easily with this app by putting a mask over the person on the photo. It will make the background blurry, but the person stays sharp. This results in a great depth effect like the Portrait Mode of the iPhone 7 Plus and the person is set in a focus of the photo.
Create “portraits” from existing photos
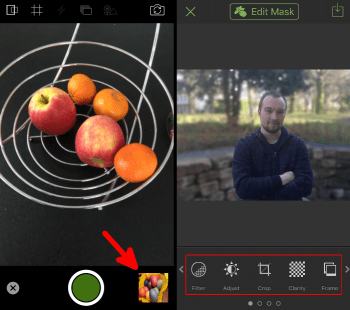
Once you open the app, the camera preview will show up. So you can either take a picture or you go to your photo library at the bottom right and choose a photo there. You will see the editing tools at the bottom now. Scroll to the side until you see Blur and choose it.
Mark portrayed person with a mask
When you are opening the tool, you will see the option Create Mask at the upper screen. There also will be two ellipses on the portrait photo, which you can move with your fingers.
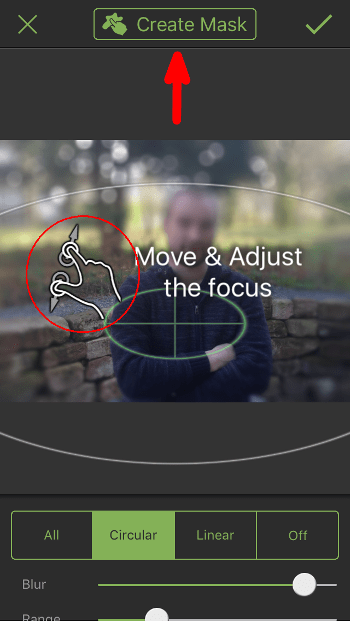
You have to tap Create Mask in order to make the background blurry and achieve the Bokeh effect. Then you have to move your finger on the edge of the person like an outline. The person will appear in green.
Edit mask
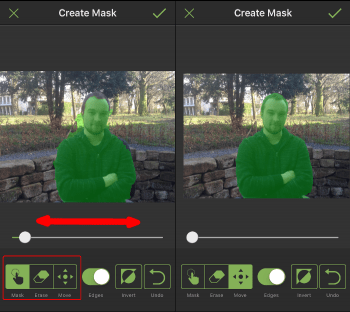
The mask has to be corrected most times. You can use the slide button for this to zoom into the photo and edit the mask more precisely. If you want to move the photo, you have to use the button Move. Then you can move to the spots, where the mask isn’t accurate. Edit the mask by choosing Erase. This way you can remove certain areas from the mask. Move your finger over the areas, which you want to remove. It should appear in red.
If you have highlighted too much or erased too much, hit the Undo button, so that you can start over this step.
If you are done with editing the mask, you click the checkmark at the top right and the photo with the mask will be saved for further modifications.
If the background and person don’t show a great contrast, it can take a while to edit the mask. After the first time working with this app, you will definitely be faster.
Edit the background of the portrait
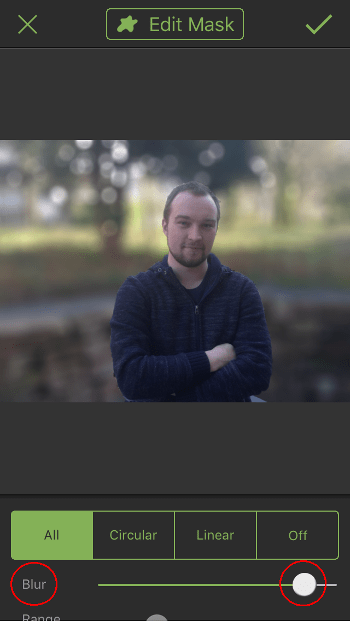
On the next level, you can choose the intensity and range of the blur effect for the background. If you click All, the whole space will be blurry, except for the mask. The blur will be very high by default. You can choose the intensity of the Bokeh effect by using the slide bar. The higher the blur in the background, the more is the person in focus.
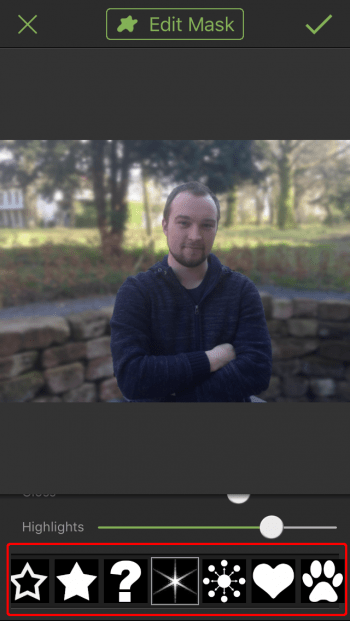
You can scroll further down in the tool list and edit the type of the light effects for the background.
Once you are happy with the result and made you photo a perfect portrait, you can click the checkmark at the top right. Then save the photo to your library, so that you share it via all your apps.