Call Forwarding On iPhone
 You receiveing an important call, but can’t pick up the phone right now? With call forwarding on iPhone, incoming calls that you can’t answer are simply forwarded to another number. We’ll show you how to set up the iPhone call forwarding feature.
Enable call forwarding on iPhone
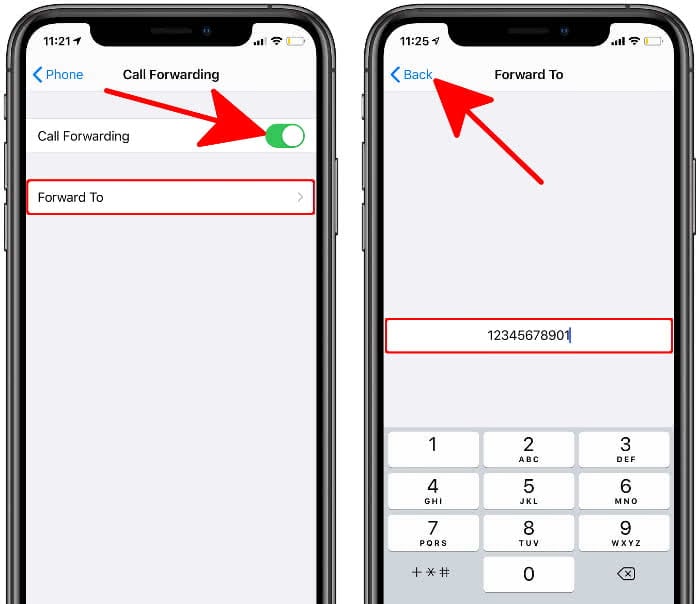
Settings → Phone → Call Forwarding → Call Forwarding → Forward To → [phone number] → BackLet’s say you don’t have time to answer a call yourself, but you want it to be answered anyway. Then you can redirect the call from your iPhone to another number or device. There are many scenarios for call forwarding: If you’re on vacation and receive a business call, you can forward it to a colleague. Even if your iPhone is off, call forwarding can make sure the call goes through.
To set up call forwarding on your iPhone, first go to the “Settings” app on your iPhone. Then scroll down a little and select “Phone”. You can now activate the function under the option “Call Forwarding”. Tap on the button to the right of “Call Forwarding” and the option “Forward To” will appear beneath it. Tap on it.

You can now enter a preferred phone number for forwarding. When you are finished, press “Back” in the upper left corner. The call forwarding is now successfully configured.
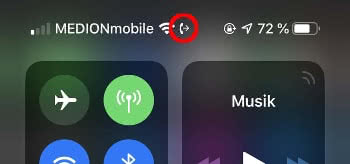
It doesn’t matter if your iPhone is off, in flight mode or you are on the phone – the call will be forwarded in any case. You can tell that call forwarding is active by the handset symbol in the status bar of your iPhone.

Please note: Call forwarding charges apply even if you didn’t answer the call yourself. The amount of the charges depends on the provider and is within the range of a normal call. Call forwarding is usually not free of charge, so it is worth asking your mobile phone provider in advance. With a suitable contract, for example, you can already cover any costs.
Disable call forwarding on iPhone
If you no longer need call forwarding, you can turn it off in the same way. Go to the “Settings” app under Phone → Call Forwarding → Call Forwarding → Forward To and delete the entered phone number from the input field. Use the “Back” button in the upper left corner to adopt the change.