How to Find Out Where You Took Photos on Your iPhone
 Keen on playing detective for a bit? Your iPhone can determine where a picture was taken by analyzing the so-called metadata. You have probably heard of metadata in the context of the secret services and surveillance programs, most modern cameras and smartphones leave extra traces of information within the image file. How to find out where a picture was taken has gotten easier with all the emerging technology in our pockets.
Image metadata can contain the GPS location of an image, at least some of the time. Most of the time, you’ll be able to see when and how a picture was taken. The “how” refers to the camera or device and the settings at the time of producing the photo.
Using just the image file and your smartphone, you can produce the results of hiring a private investigator and find out where a picture was taken, given a bit of luck and patience.
How to retrieve photo metadata with an iPhone
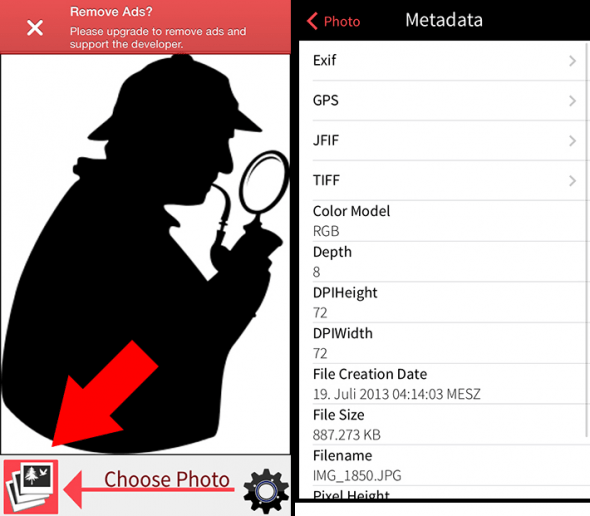
App Store > Photo Investigator > Choose PhotoYou can freely download the awesome Photo Investigator app from the iTunes App Store. This app will allow you to check out all of the extra information that has been invisibly stored in image files by the device that took the image. Use the “Choose Photo” button to access your Photo Library and pick the picture in question. Photo Investigator will show you all of the metadata it can retrieve in a handy overview.

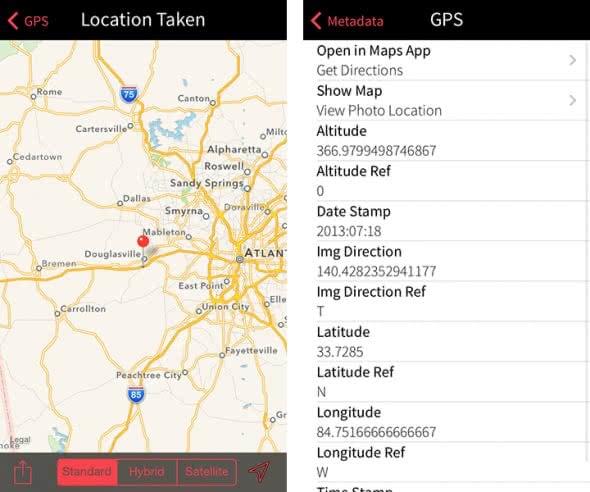
As you can see, Photo Investigator has already gotten a hold of the File Creation Date. By tapping the sub-sections for Exif, GPS, JFIF and TIFF we can further investigate the hidden information in the file for more clues. To find out where a picture was taken, tap the “GPS” section and delve further into the metadata.
If the image contains any location data, it will be visible right here. Tap “Show Map” to see the pinpointed location on a map. The accuracy is fairly reliable, although it might differ from device to device, so keep that in mind.
