How To Screen Record On iPhone & Save As Video
 This article shows you everything you need to know about the new screen recorder function of the iPhone and how you can easily and quickly access the screen recording to capture and save a video of your iPhone screen. For a long time you had to go through Quicktime Player if you wanted to record your iPhone screen or you had to use 3rd party iPhone screen recording apps. But now Apple included a native screen recording feature in iOS, to easily record a video of your iPhone screen right within iOS.
iPhone Screen Recording
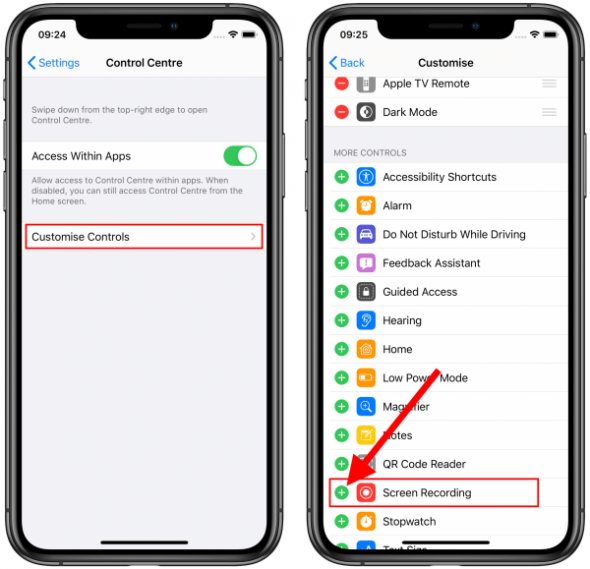
Settings → Control Centre → Customise Controls → Screen Recording
In order to use the screen capture feature, you must first add it to your control center. To do this, go to the Settings App and select the Control Centre menu which will bring up a new screen. There you have to tap on Customize Controls. Now you can add and remove items to your control center. Find the option “Screen Recording” in that list and add it by tapping the little green plus icon right next to it.
In the control center you will now find a new white round icon for the ios on screen recorder. Remember to open the control panel by swiping from the bottom of the screen upwards (up to iPhone 8) or from the top right corner of the screen downwards (iPhone X and newer). You can now start a new screen recording by simply tapping on the screen record button.
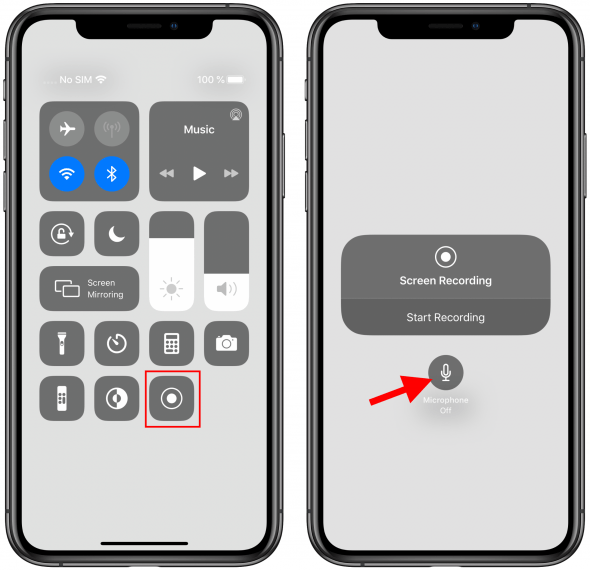
If you press and hold the button you can open a new screen with further options to configure more settings for the iPhone screen capture. If the microphone is active, not only will the audio be recorded that plays on your iPhone, such as video, but also external sounds such as your voice will also be recorded. To avoid noise, find a quiet place to record. Or if you do not need the microphone to capture outside sounds while you record the iPhone screen, you have to make sure to turn the Microphone setting to “Off”.
After tapping the screen recording icon or the “Start recording” button, a three second countdown will appear, so get ready for the recording session. Once the three seconds have passed the icon will change colors from white to red to signal that your iPhone screen and everything you do with your iPhone will now be recorded.
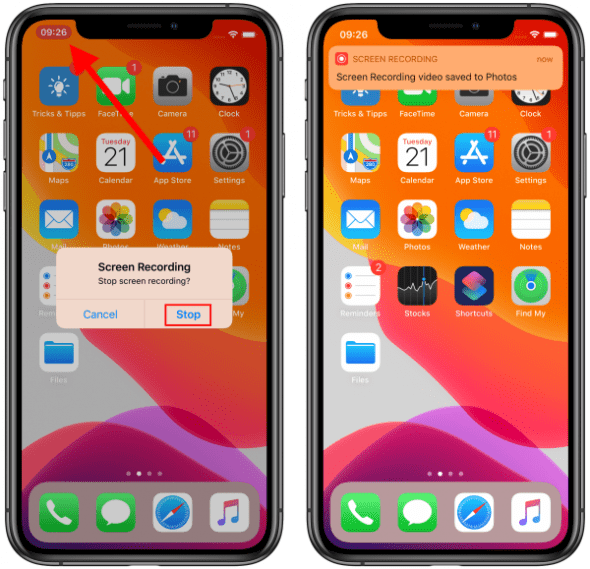
Now you can leave the control centre and do whatever you want to record as a video on your iPhone. The clock background in the upper left corner also changed to red colors indicating the ongoing screen recording. Whether you use an iPhone X or an iPhone 8, iPhone 7 or iPhone 6 for this function is irrelevant.
Stop Screen Recording
If you want to stop recording, just tap on the red clock in the upper left corner. A popup will appear and you have to confirm that you want to stop screen recording by hitting “Stop”. Of course you can also stop the video via the control center. Another notification will appear, indicating that the screen recording has been saved in your Photos. Tap it to quickly jump right to the photos app and to view the video yo just recorded.
Edit Recorded Video
The iPhone records all activities, including switching on or stopping the screen recording. For example, if you want to upload clips from a screen recording to YouTube, you need to crop the video accordingly.
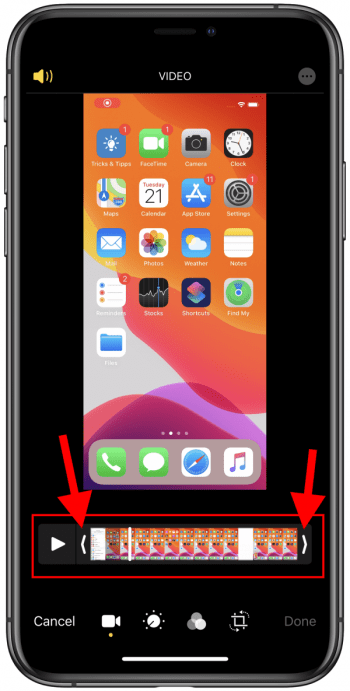
To do so you just have to open up the screen recording video in your Photos app and then hit the “Edit” button in the upper right corner. Now you can use the arrows in the timeline to crop the video by simply moving them right or left. Of course you also have other video editinig options that you can use. Once you are satisfied with the result you can save as a new video or just save over the old screen recording video. Don’t worry you can always revert your changes with one click.