How to Save iPhone Backups on An External HDD (Mac)
 Is your iMac or MacBook running low on HDD space? If your system drive and/or other hard drives are full and you would still like to back up your iPhone, the iCloud backup would be one option. But some people prefer local backups for their speed, which is a special advantage when dealing with a slow internet connection. Here’s how to change the iPhone backup location to an external HDD (hard drive) on a Mac.
Prerequisites: You will require an external drive and Mac OS X for this trick to work. It doesn’t matter whether the drive you are dealing with is a USB thumb drive, or a hard drive connected via USB 2.0, USB 3.0 or Thunderbolt.
Preparing your external drive
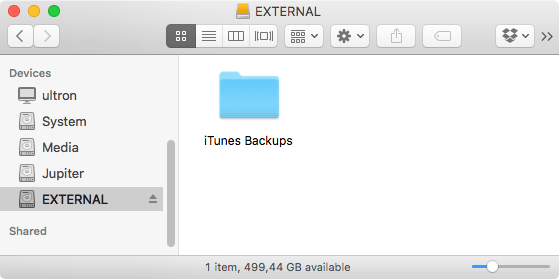
Connect your storage media to the Mac, then open up the Finder. In the sidebar, you’ll find your external drive listed under Devices. Select the appropriate entry from the list to continue. Then create a new folder (Right Click > New Folder) and name it whatever you like, we called it iTunes Backups for simplicity’s sake.

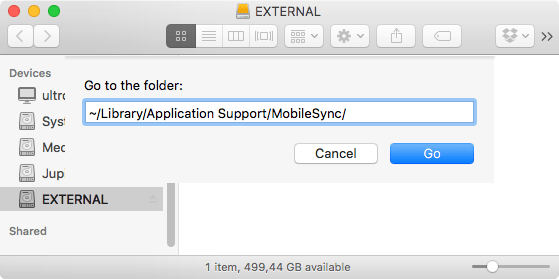
Next, we will be navigating to the folder where iTunes keeps your iPhone backups. The easiest way of accessing this backup path is by using the Go command in Finder. Click Go > Go to Folder… then copy and paste the following path into the text field:
~/Library/Application Support/MobileSync/

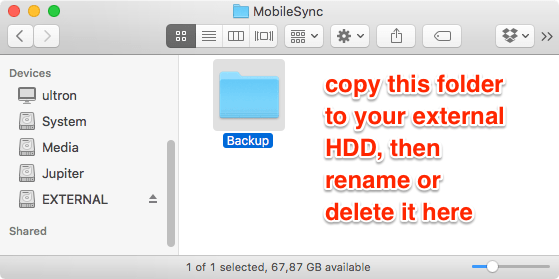
Now select the Backup folder by clicking it and copy it via the right click menu or using command + C as a keyboard shortcut. Then paste it into your iTunes Backups folder on the external drive. After the copy process is done, rename the folder on your Mac to something like iTunes Backups Old or delete it if you really need the space.

Creating the symlink in Terminal
Last but not least, we will be creating a so-called symbolic link to tell our Mac that this folder has been moved to another location. iTunes will then automatically create the backups on the external drive. Symbolic links work under the hood and are great for situations such as these, where applications themselves do not allow to adjust a default path in their settings but can effectively be fooled on this level.
Open up your Terminal application and enter the following command, you may have to adjust the first of the two paths to fit your particular situation, as it describes the path to your external drive and the name can vary (edit red part as needed).
ln -s /Volumes/EXTERNAL/iTunes Backup/Backup/ ~/Library/Application\ Support/MobileSync/Backup

To check whether our little project was successful, simply open up the ~/Library/Application Support/MobileSync/ path in Finder again as we already did, you should see the newly linked folder with a tiny arrow icon and double-clicking it should lead to your external hard drive. Make sure to keep the drive connected for future backups!
Creating a Backup via iTunes
(Backing up your iPhone via iTunes is pretty easy, the only difference is the destination and as said, everything happens under the hood and iTunes shouldn’t notice any changes. After testing and verifying that iPhone backups do indeed work for you, you can safely delete the old backup folder on your Mac’s drive and enjoy a few gigabytes worth of additional storage.