How To Create Slideshow On iPhone
 The iPhone camera is becoming increasingly popular and is already the only camera many people use in everyday situations or on their holidays. After all, the photo quality is impressive and the iPhone is a constant companion for most people anyway. In order to be able to show e.g. holiday photos taken with the iPhone appropriately, Apple has integrated a slide show function into iOS, somewhat hidden from view.
Select photos in advance
On your iPhone, in addition to those photos you want to share with your friends, you may find other photos that aren’t meant to be seen by others. That’s why you should select the photos you want to show in advance.
To do this, first open the Photos app and create a new album with the respective photos.
In the Photos App, tap on “Photos” in the lower left corner and look for a group of pictures you want to present. To select such a group, first tap on “Select” in the upper right corner and mark the photos by swiping across the screen.
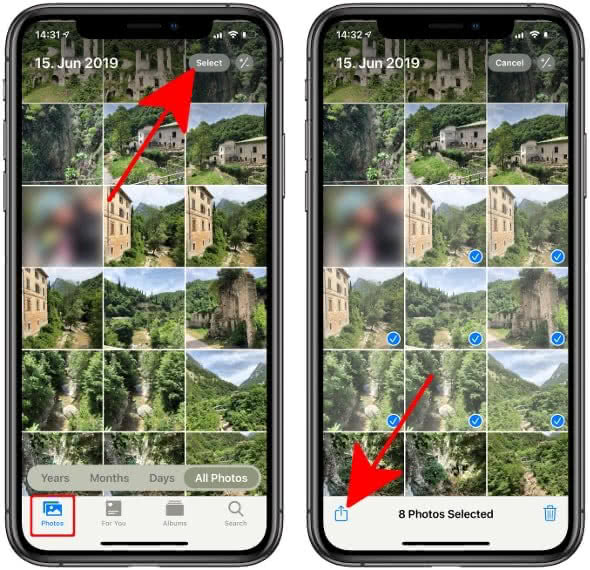
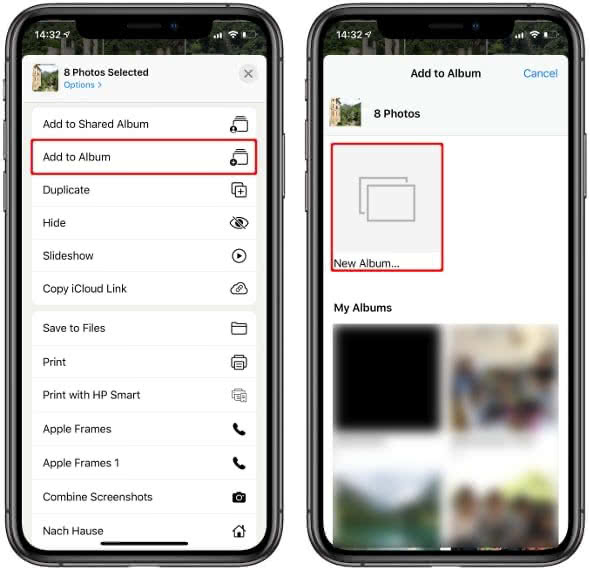
Now tap on the Share button in the lower left corner and select “Add to Album” from the list. Tap on “New Album” and give it any name you like – such as e.g. “Holidays in Italy” – and press “Save”. You have now created a new album for your slideshow.
Create iPhone slideshow in Photos app
In the Photos app, tap “Albums” in the lower right corner and open the album you just created. Then tap the first picture to open it. Now tap the Share icon in the lower left corner and press “Slideshow” from the list. Of course this also works with old and already created albums.
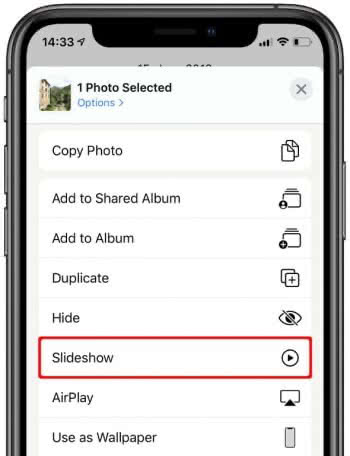
If an Apple TV or other AirPlay-compatible device is nearby, you can watch the slideshow on it as well. You can also connect your iPhone to a projector or TV using an HDMI adapter to watch the sliedeshow.
Customize slideshow settings
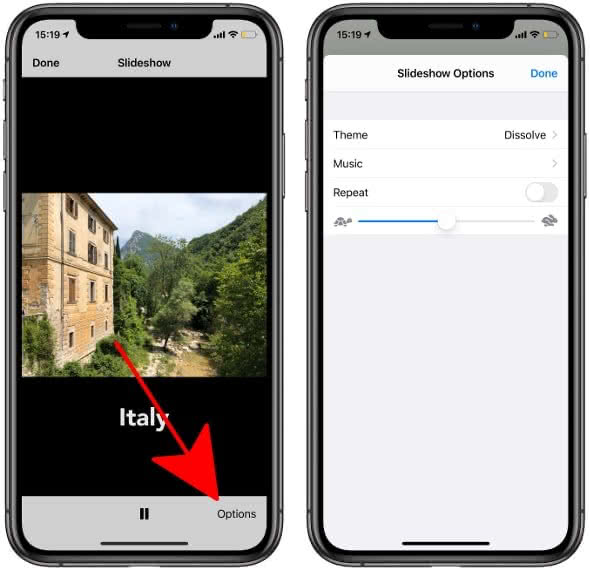
Tap on a photo during the slide show and select “Options” in the lower right corner to set the time per picture and the repetitions as well as the theme and music. Press “Done” in the upper right corner when you are finished with the settings.
