iPhone Swipe Keyboard – How To Enable & Use “Slide-to-Type”
![]() Typing on the virtual iOS keyboard takes a little longer than on a real keyboard, depending on your dexterity. But with the right touch gestures, however, you can speed up the process. We’ll show you how to swipe on the iPhone keyboard instead of typing.
Typing on the virtual iOS keyboard takes a little longer than on a real keyboard, depending on your dexterity. But with the right touch gestures, however, you can speed up the process. We’ll show you how to swipe on the iPhone keyboard instead of typing.
Enable Slide-to-Type on the iPhone
Settings → General → Keyboard → Slide to TypeIf you are currently in “Messages” or the “Notes” app (or any other app where you can use the iOS keyboard), you can now swipe on the keyboard instead of typing. Some of you may already know this from third-party apps like SwiftKey. This feature is now built into iOS and enabled by default, so you can get started right away.
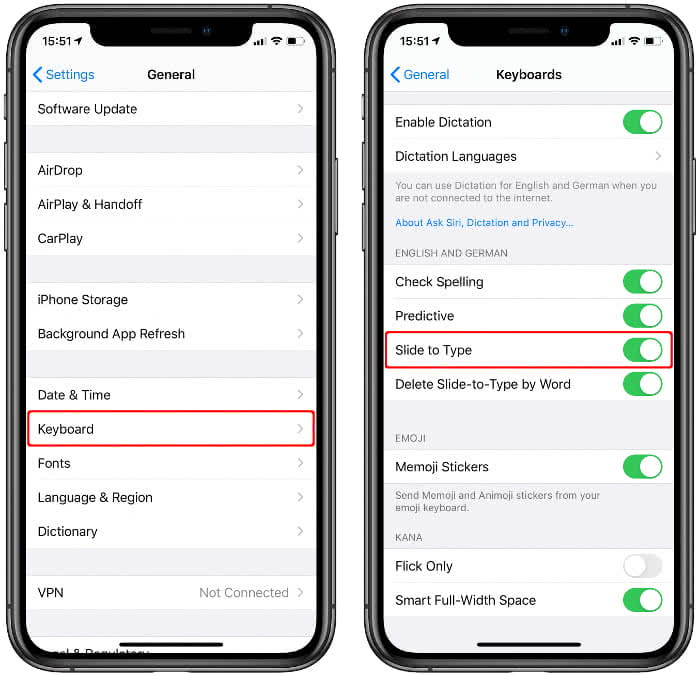
If it is disabled (for whatever reason), you will need to open the “Settings” app and go to “General”. Select the “Keyboard” option and enable “Slide to Type” by tapping the button to the right of it. This button will now be displayed with a green background.
For example, you can now open iMessage, select a chat, and swipe your keyboard from one letter to the next. It’s important that you don’t let your finger leave the screen while you’re composing a word. This may take some getting used to at first, but after a while the wiping gestures become easy.
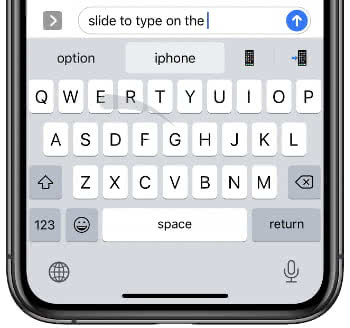
By the way, this works surprisingly well in combination with the auto-correction and reduces the number of incorrect entries enormously.