5 Tricks for High Quality Voice Recording Using iPhone
 The iPhone is a useful tool for creating amateur sound recording while on the go, or even high quality voice recordings for semi-pros and pros. Quite a few news reporters make use of their iPhones when recording a sound bite or quick interviews. If you are interested in how to create a high quality voice recording using iPhone, check out our 5 top tricks.
Prerequisites: This trick does not require you to install any additional software, nor to use any specific version of iOS. The tips below also work with third-party apps.
How to create high quality voice recordings using the iPhone
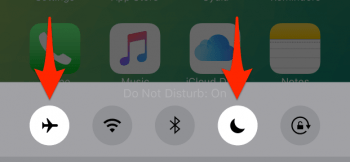
1. Use airplane mode and DND mode
Getting a call while recording audio is a sure-fire way to get interference on your recording, which we really want to avoid. Interruptions in the form of notifications can also be distracting, which is why we recommend to enable Do Not Disturb, as well as Airplane Mode to turn off all wireless radios on your iPhone. This can be done by swiping up from the bottom of the screen to reveal the Control Center, then tapping the corresponding icons.
Remember to disable both toggles after recording, so that you can be reached easily.
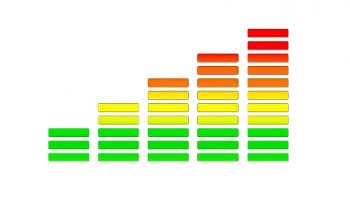
2. Check your levels before recording
Recording with the wrong levels and audio limits can destroy your recording through distortion or a noise floor that is too close to the actual recording, meaning that all speech will be either annoying to listen to or even incomprehensible. A quick sound check can be all you need to verify whether the distance to the mic is correct, or whether you need to speak up. Note that most apps have a color coded signal bar design that allows you to see whether you’re in the red area, which signifies input levels that are too high. Ideally, you should be in the green or yellow segments while speaking.
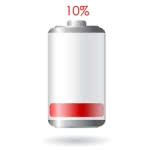
3. Check your battery percentage
Charging your iPhone before conducting a voice or audio recording is a good idea. If you are low on battery but there is no wall socket in sight, we recommend making use of the integrated Low Power Mode to conserve all possible resources and keep the battery drain as low as possible. This should allow you to record all of the audio you need in most cases.
4. Record in several runs and save frequently
To avoid losing previous recording time, make sure to stop and save in between snippets and split up your recording work in manageable passages. This works a lot better than recording an entire session in one go, as it takes only a single crash to ruin this most vulnerable creative process. Nothing is as demotivating as losing an hour or more of audio due to a simple bug or power failure.
5. Do not use a wireless headset for recordings
While some headsets work alright, we generally recommend to not go for wireless audio solutions when it comes to voice recordings on the iPhone. Test the internal mic if you cannot afford a separate solution, it does a surprisingly good job when the iPhone is turned upside down. Otherwise, go for a lavalier cable microphone that plugs into your headphone jack on the iPhone.