iCloud Mail: Create, Turn Off & Remove Alias
 Let’s pretend John Smith has a private iCloud mail address which is called “[email protected]” and he doesn’t want to give away his private mail address to everybody. In this case, he could go to another email provider like Yahoo, Outlook or Google, and create a new email address. However, he could also take the smarter way: He can create an Alias for his iCloud mail address. This way he could use for example [email protected] for his business contacts. We show you how this works.
What is an Email alias?
An email alias is not a new email address, but one that hides the original email address to the receiver. You can also use the email alias, when you buy products online or when you sign up for mailing lists. After the purchase or if you get too many emails from a mailing list, you could deactivate or delete the alias again (we get to this later).
You can have up to 3 active iCloud alias addresses in addition to your real mail address and with iCloud Mail you can check your iCloud Mail account on every Apple device and all other systems, it will always be synchronized.
iCloud: Create iCloud email alias
iCloud.com → Mail → Settings → AccountsIf you want to create an email alias, you have to use your Mac or computer and you also need an iCloud email address. If you want to learn how to activate your iCloud email address on your iPhone follow our guide. Open the following URL in any internet browser:
Sign in with your Apple ID and password. Click the “Mail” button on the iCloud home screen. Inside the Mail, click the “settings icon” (wheel) and go to “Preferences”.
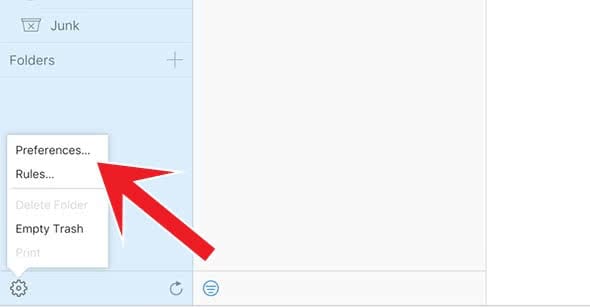
Then choose the category “Accounts”. In the sidebar, your iCloud mail address will be displayed in addition to your alias (if you have any). If you want to create a new alias, click “Add alias”.
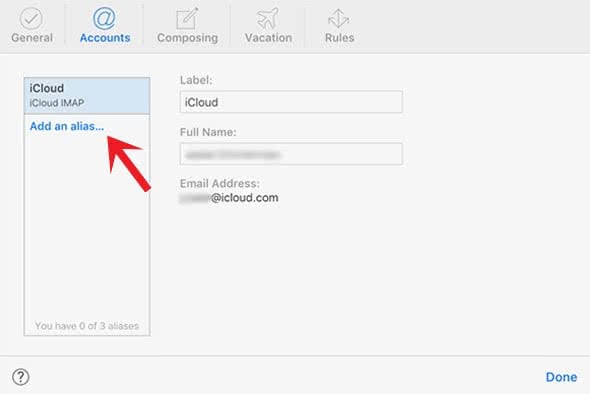
Enter your preferred alias into the Alias field and click “OK”. You will be notified at this point if the email address already exists. Otherwise, you will see that the alias has been created.

You can also change your iCloud alias afterwards. You just need to click on your alias and change the name.
Your iCloud Mail alias is now ready to use.
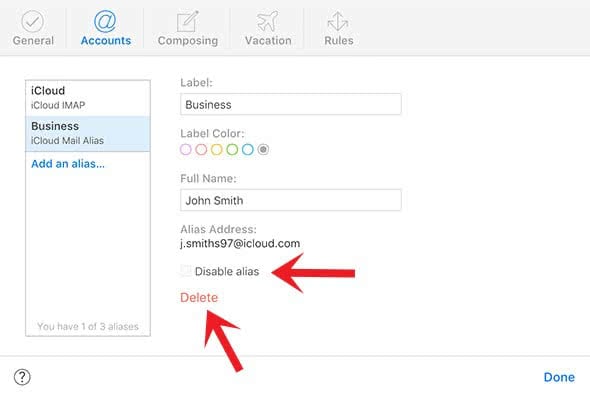
Delete and disable mail alias
iCloud.com → Mail → Settings → AccountsTo disable or remove an alias, you have to click the certain alias on the Accounts screen. Now you have two options:
- Click “Delete” to remove an alias. This will not be able to use this alias again. So it cannot be reactivated. The amount of alias will be reduced (max. 3).
- Click “Disable alias” and confirm with “Done” at the bottom. If an alias is deactivated, all emails sent to this will go back to the sender. You can activate the disabled alias any time. The amount of alias is still the same (max. 3).