Manage iPhone Storage: Freeing Up Space
![]() Before buying an iPhone, take into consideration how much space you’ll actually need. While most apps don’t take up as many megabytes, music and photography as well as video downloads can quickly escalate into the multi-digit gigabyte range. If you want to be on the safe side, go for at least 64 GB of internal storage space.
Before buying an iPhone, take into consideration how much space you’ll actually need. While most apps don’t take up as many megabytes, music and photography as well as video downloads can quickly escalate into the multi-digit gigabyte range. If you want to be on the safe side, go for at least 64 GB of internal storage space.
If you bought an iPhone and skimped on storage capacity due to the higher prices of a well-equipped unit, you might find yourself in some trouble. This guide will show you how to make the most of limited iPhone storage space via managing the internal iPhone storage and freeing up space on your smartphone.
Manage iPhone storage
General → Usage → Manage StorageFinding the culprit is quite easy, thankfully. Your iPhone will provide you with a list of all the factors which take up space on the iPhone. Freeing up space on your smartphone is a simple matter of seeing which of the content on your phone is large in size.
Open up your settings up via the home screen or tell Siri to take you to your iPhone’s settings menu. Next tap on “General”, then select “Usage” and finally “Manage Storage” to see an overview of your internal storage.
This screen will also show you how much of your storage is free vs. how much is currently used. The items on the list are descending in order of size, that way you can spot the ones with the most impact on your storage by looking at the top of the list.

Delete apps to free up space
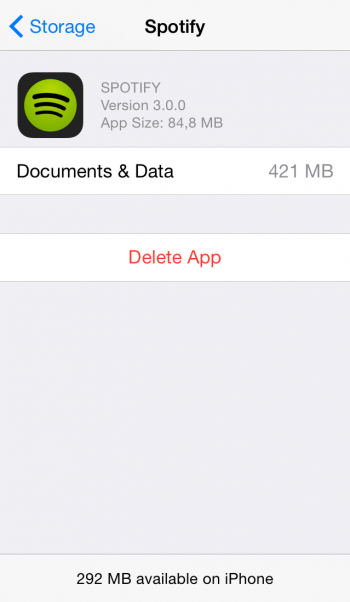
Once you discover an app that you either don’t want any more, or you’re unhappy about the amount of storage space it is eating up and decided to not longer keep it, you can delete the app from your iPhone. To delete an app, simply tap on its name in the overview and select ‘Delete App’ in the following screen.
Deleting an App will usually keep some of your settings regarding the specific app. Although, some of the related content (especially content you created with the use of that app) that has not been backed up to the cloud, might disappear with the deletion of an app.
Delete photos, music and video content to free up space
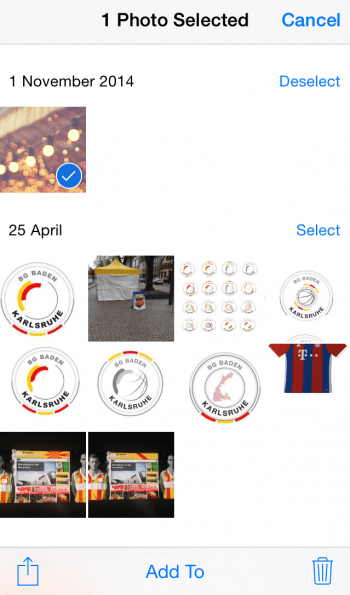
Getting rid of unneeded photos and videos is as easy as opening the corresponding app, hitting ‘Select’ in the top right corner and tapping the thumbnails of any images you want to delete. When you are ready to delete the selected photos from your iPhone, tap the garbage bin symbol in the bottom right corner.
Music and video content is deleted within the corresponding apps, too. To delete a song or an album within Apple’s own music app, swipe left on its title and hit delete. Simple as that.
Please make sure to create backup copies of any kind of media content which was not purchased via iTunes, otherwise you might not be able to restore it afterwards. Deleted photos are kept in a special folder called ‘Recently Deleted’ within the ‘Photos’ App and stay there for a grace period so you can restore them if needed. If you use the iCloud Photo Library feature, your storage is being managed automatically.