How To Take Better Photos With Your iPhone Under Bad Light Conditions
![]() In our article “iPhone Photography 101: How to Take Better Shots“, we gave you numerous tips and tricks that you can use to take better photos with you iPhone. In this article, though, we want to focus on a special problem: iPhone photography under bad light conditions. We will show you how you can reach better results if you are taking photos in the dark – for example on the streets at night.
In our article “iPhone Photography 101: How to Take Better Shots“, we gave you numerous tips and tricks that you can use to take better photos with you iPhone. In this article, though, we want to focus on a special problem: iPhone photography under bad light conditions. We will show you how you can reach better results if you are taking photos in the dark – for example on the streets at night.
Tips for better photos under bad light conditions
Take the following steps from our little guide and you will reach better results when you take photos under bad light conditions:
1. Turn LED flash off
First, you have to turn the LED flash off. Doing so, tap the flash icon on top inside the Camera app. Then choose Off.

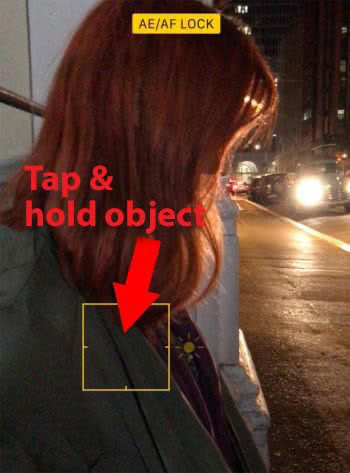
2. Lock focus and exposure
Then activate the AE/AF Lock. Tap and hold your object until you see the notification “AE/AF Lock” on top of the display. This means that the focus and exposure will no longer automatically adjusted.
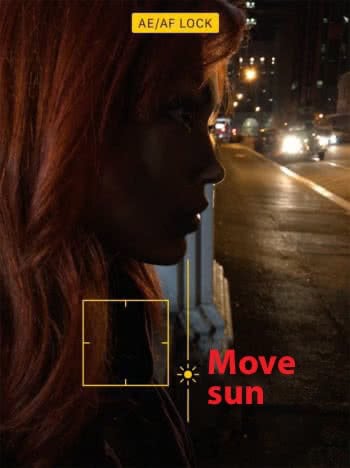
3. Adjust brightness
Now move the brightness icon (little sun) up or down to adjust the iPhone camera brightness and achieve optimal results.
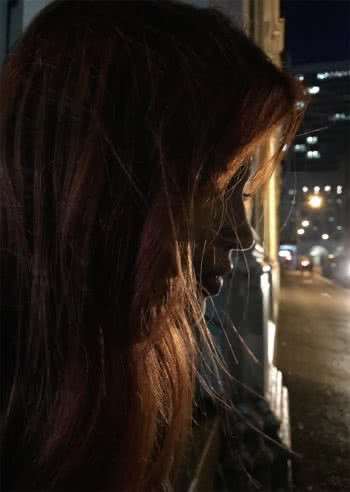
4. Take photo
Now keep the iPhone still and press the release button to take a photo.
Bad quality for Live Photos
If there are bad light conditions while you want to take Live Photos, it could affect the photo quality negatively. So it would make sense to turn off the feature if you are taking photos at night.
Tip: You took a great photo but there is an annoying object in the picture. We show you how to remove the object from your photo using just your iPhone!