How to Delete Your Facebook Account permanently
 Since information about a firm gaining illegal access to Facebook data hit the news many users want to delete their Facebook accounts permanently. A firm illegally used data from 50 Million Facebook users to influence the presidential election. Data that others already gained access to cannot be retrieved so deleting your account seems like a good idea. But Facebook doesn’t make it easy to delete your account permanently. Therefore, many users just deactivate their account. We explain how to delete or deactivate your Facebook account as well as how to check your privacy settings.
Contents
Delete your Facebook account permanently
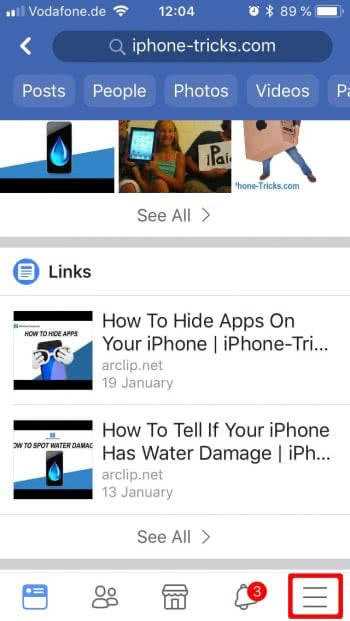
Facebook-menu → Help and Support → Helpcenter → Managing Your Account → Deactivating or Deleting Your Account → How do I permanently delete my account? → let us know → Confirm Facebook Account DeletionDeleting your Facebook account requires a request for deletion to Facebook, which takes a few steps. First open the Facebook menu (hamburger icon/three bars in the lower right corner) and scroll down to “Settings”.
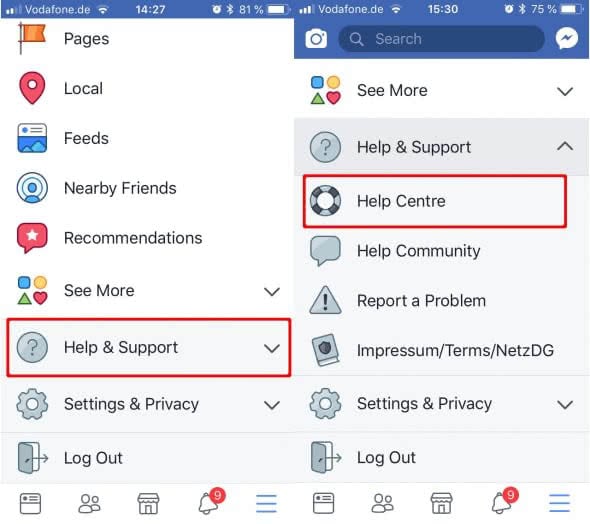
Afterwards tap on “Help and Support” and in the Pop-up menu, tap on “Helpcenter”.
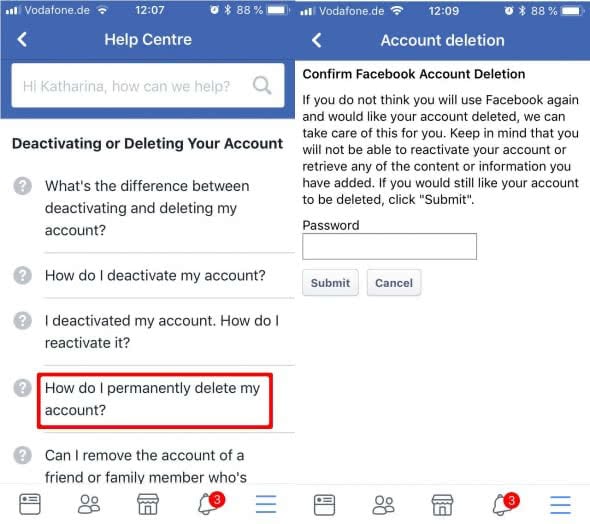
In the Helpcenter you now tap on “Managing Your Account” and choose “Deactivating or Deleting Your Account” from the list.

In the following list tap on “How do I permanently delete my account?” and in the following text follow the blue highlighted link saying “let us know”. Now you can enter your password and delete your account permanently.
Tip: Cringeworthy statements? Embarrassing party photos? Here’s how to delete all your Facebook posts at once!
Keep in mind, that you will not be able to retrieve any data from your account after deletion and also won’t be able to reactivate your account. Processing your request for deletion can take up to 90 days and Facebook also informs you, that sent messages may be saved in your contacts accounts. All of your other personal data will be deleted without any backup though.
If you want to delete your WhatsApp account as well follow this guide to delete WhatsApp and delete WhatsApp account.
How to deactivate your Facebook account
Maybe you prefer to deactivate your Facebook account rather than deleting all of the data permanently. This way your data stays and you can reactivate your Facebook account at any given time with your entire data still there.
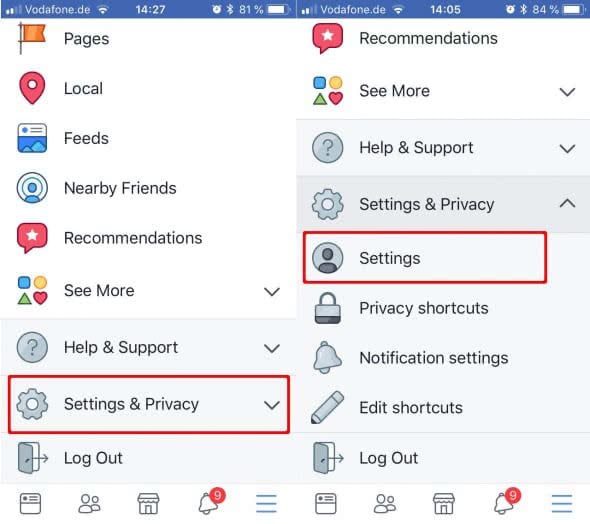
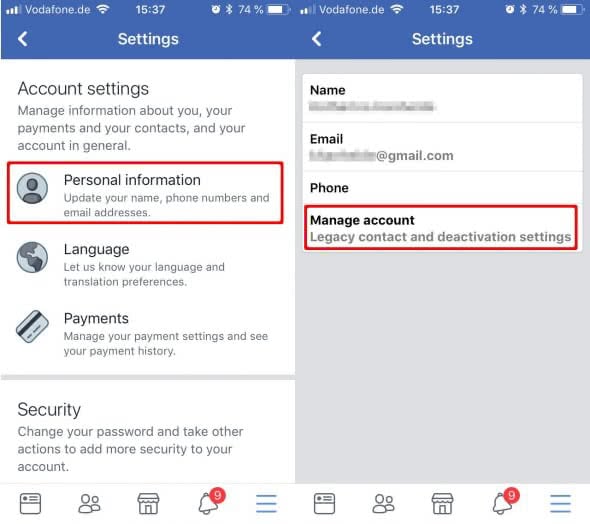
Facebook-menu → Privacy & Settings → Settings → Account Settings → Personal Information → Manage account → Deactivate → Enter Password → choose reason and deactivateIt is a little less complicated to deactivate a Facebook account than to deleta a Facebook account completely. First open the Facebook menu (hamburger icon/three bars in the lower right corner) and scroll down to “Settings”.
Afterwards tap on “Privacy & Settings” and “Settings” in the Pop-up menu.
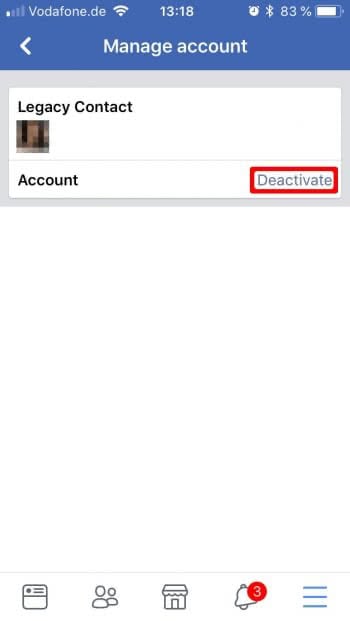
In the section labeled “Account Settings” tap “Personal Information”. You can now see your personal information and should tap “Manage account” Here you can choose your legacy contact as well as deactivate your account.
Now tap on “Deactivate” and enter your password.
The following window urges you to choose a reason (“I have a privacy concern” seems like a legitimate reason), scroll down to the bottom of the page and tap on “Deactivate”.
Check your privacy settings
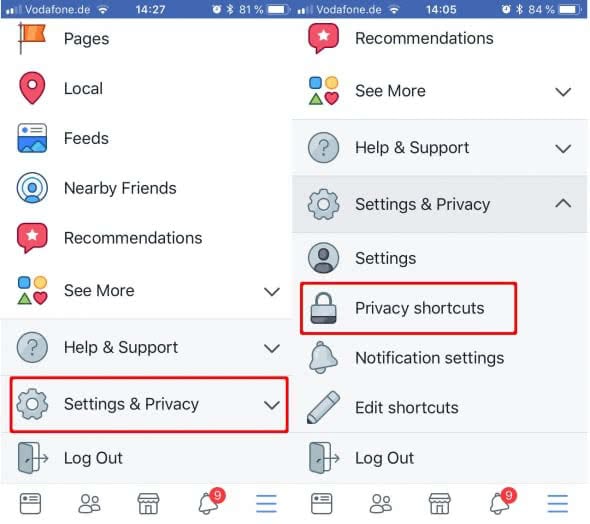
If you want to keep your Facebook account, you can check your privacy settings to protect your data as best as possible. Use the Facebook menu (hamburger icon/three bars in the lower right corner) and scroll down to “Settings & Privacy” and tap your “Privacy Shortcuts”.
Did you know that you can also improve your Facebook Messenger Privacy Settings when you turn off your last active status on Facebook Messenger? Learn how to hide last active on Facebook Messenger.
Now check your data as well as alter the settings to your preferences. Facebook also explains the results of the changes to the settings.
Hint: You can also improve your privacy settings for Instagram. Learn how to protect your privacy better.